PPA Tutorial - Part 4 - Going Headless
In this tutorial, you will learn how to invoke the code of your plug-in from the command line without displaying the Eclipse GUI or requiring any user input.
To be able to invoke your code from the command line, you need to create an Eclipse Application and the best way to do this is to create a new Eclipse plug-in that will depend on the plug-in (MyFirstPlugin) you created in the previous part of this tutorial.
This tutorial assumes that you have completed the first three parts of the tutorial and that you are now familiar with the main menus, views and editors of the Eclipse environment.
Configuring MyFirstPlugin
- You need to configure the plug-in you created (MyFirstPlugin) so that other plug-ins can depend on it and use the classes you created.
- Open the Plug-in editor (e.g., by double-clicking on the plugin.xml file in the Package Explorer)
and go to the
Runtimetab. - In the
Exported Packagessection, add the packages of your plug-in,myfirstpluginandmyfirstplugin.actions:

Creating the headless plug-in
- Create an Eclipse plug-in project (right-click in the Package Explorer, select
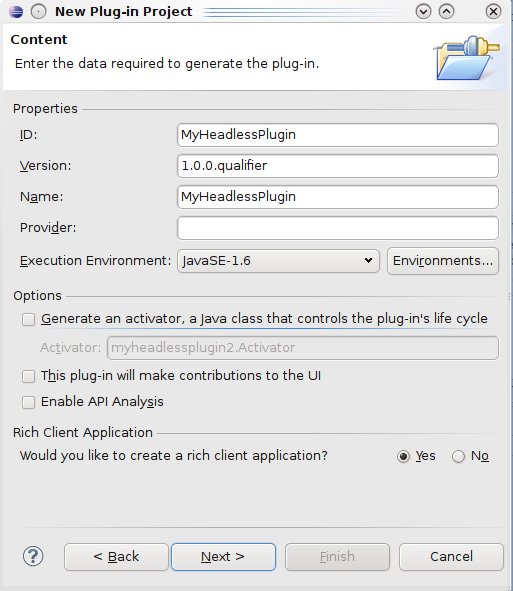
New /
                Project...
, thenPlug-in Development / Plug-in Project) - Use the name
MyHeadlessPlugin, then on the next page, ensure that all the checkboxes are unchecked and that you have selected yes to the question "Would you like to create a rich client application?":
- On the next screen, select the template
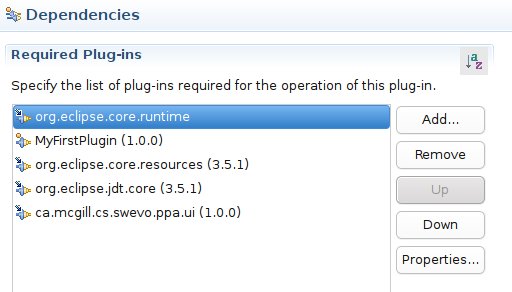
Headless Hello RCP, accept the default options and flick onFinish. - Open the plug-in editor of MyHeadlessPlugin and navigate to the
Dependenciestab. Add the following plug-ins to your dependencies:MyFirstPlugin,org.eclipse.core.resources,org.eclipse.jdt.core, andca.mcgill.cs.swevo.ppa.ui:
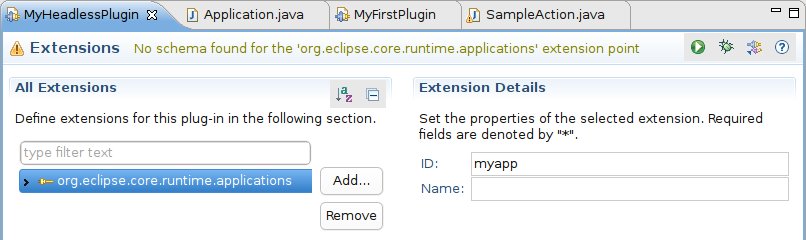
- Navigate to the Extensions tab, and select the
org.eclipse.core.runtime.applicationsextension point. Change ID formyapp:
-
Open the
Applicationclass that has been created inmyheadlesspluginpackage. Modify the code of thestart(IApplicationContext context)method:
public Object start(IApplicationContext context) throws Exception { File javaFile = new File("/home/barthelemy/A.java"); // CompilationUnit contains the AST of the partial program // PPAOptions is a wrapper and contains various configuration options: // most options are still not implemented, so the default options are // usually fine. CompilationUnit cu = PPAUtil.getCU(javaFile, new PPAOptions()); PPATypeVisitor visitor = new PPATypeVisitor(System.out); cu.accept(visitor); return IApplication.EXIT_OK; } - If the import statements are not added automatically, just press on
Ctrl+Shift+O. The code that you just wrote should look familiar. Basically, you are using thePPATypeVisitorclass you created inMyFirstPlugin. If you had not added the package of this class in theExported Packagesof MyFirstPlugin and if you had not added MyFirstPlugin to the dependencies of MyHeadlessPlugin, you would not be able to accessPPATypeVisitor.
Testing the headless plug-in
- You will now test if you can invoke the plug-in without displaying the Eclipse GUI. Go to the Run
Configurations dialog (select
Run / Run Configurations...). - Create a new Eclipse Application that you will call
Headless. - Under the
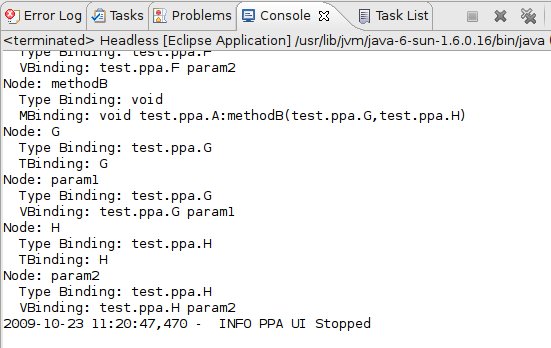
Program to Runsection, selectRun an application:andMyHeadlessPlugin.myapp. - Apply the changes and click on the
Runbutton. The code should be executed and you should see in your console the types of the expressions in the abstract syntax tree of file A.java:
Installing your plug-in in Eclipse
- To be able to invoke your code from the command line, you need to execute an Eclipse instance that has your plug-in installed. In this part of the tutorial, you will export your plug-in and you will install them in Eclipse.
- In the Plug-in editor of
MyFirstPlugin, navigate to theOverviewtab. - Click on the
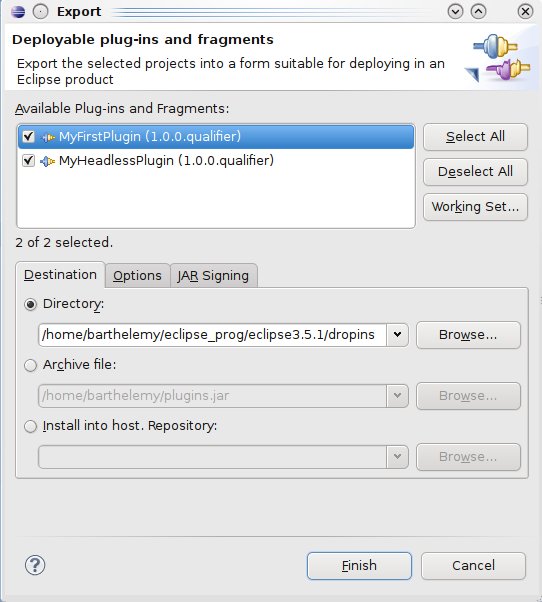
Export Wizardlink at the bottom right. - Select the two plug-ins you created so far (MyFirstPlugin and MyHeadlessPlugin), and put the path
of the dropins directory of your current Eclipse installation. This tutorial assumes that you have
installed Eclipse under
/home/barthelemy/eclipse_prog/eclipse3.5.1:
- When you start Eclipse, Eclipse always look in the dropins directory to see if there are new
plug-ins to install. Close and re-open Eclipse so that your two plug-ins are installed in your Eclipse
development environment. You should see an Eclipse button in your toolbar:

Executing the headless plug-in
- You are now ready to execute your program from the command line. Close Eclipse.
- Then navigate to the installation directory of your Eclipse installation (e.g.,
/home/barthelemy/eclipse_prog/eclipse3.5.1) and enter on the command line:
./eclipse -data "/home/barthelemy/workspaces/runtime-New_configuration(1)" -nosplash -application MyHeadlessPlugin.myapp - You should now see the types of the expressions in the abstract syntax tree of A.java.
- The -nosplash flag tells Eclipse to hide the spash screen.
- The -data flag tells Eclipse which workspace to use. This tutorial assumes that the workspace you
use to test your plug-in is located at
/home/barthelemy/workspaces/runtime-New_configuration(1). - The -application flag tells Eclipse to run a custom application.
Next steps
You can try to pass additional arguments to the command line. They should be accessible through the
IApplicationContext object in the start() method of your application.
This concludes the tutorial on PPA. If you have any question or comment, do not hesitate to contact me,
Barthélémy at bart at cs dot mcgill dot ca.