Step 5: Creating a Filter
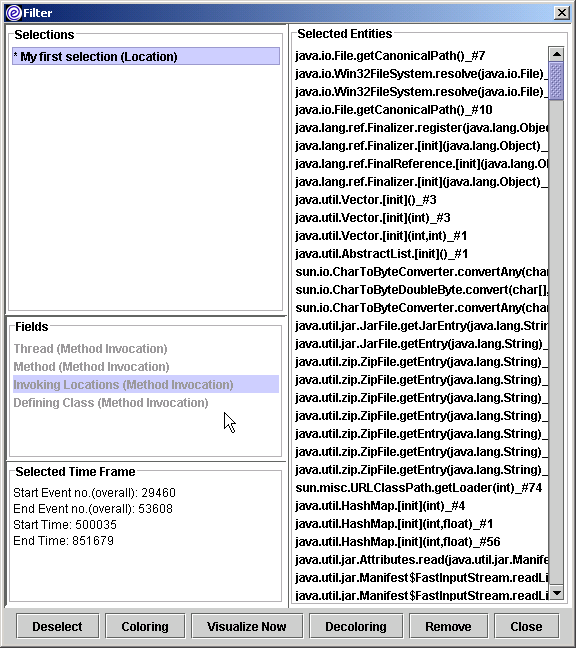
The filter dialog is divided into four parts. The "Selections" box holds all selections that we
made so far. In the "Fields" box, all fields affected by this selection are shown. In this example,
since the y-axis of the visualization is "Invoking Loocation", this field is highlighted. "Selected time frame"
box displays selected time information. It shows that the time interval we selected starts from
bytecode 500035 and ends to bytecode 851679. All selected entities' names are shown
in the "Selected Entities" box. Click the Close button to accept the filter and close the
dialog.