PPA Tutorial - Part 2 - Creating an Eclipse plug-in
In this tutorial, you will create an Eclipse plug-in. A plug-in typically adds features to the Eclipse environment. You can only access PPA API from an Eclipse plug-in because PPA is also implemented as an Eclipse plug-in and extends the Eclipse Java compier.
This tutorial is a quick introduction to Eclipse plug-in development and it assumes that you completed Part 1. At the end of this tutorial, you will have created a small button on the Eclipse toolbar that displays a message dialog. For a more information about Eclipse plug-in development, consult the Eclipse platform developer guide.
Creating a plug-in project
- Assuming that you are still in the Plug-in Development Perspective (the current perspective is
shown on the top right corner of Eclipse), create a new plug-in project by right-clicking in the
Package Explorer. Select
New / Project..., thenPlug-in Development / Plug-in Project - The name of the project will be MyFirstPlugin. Accept all the default options and push on the
Nextbutton until you see theTemplatespage:
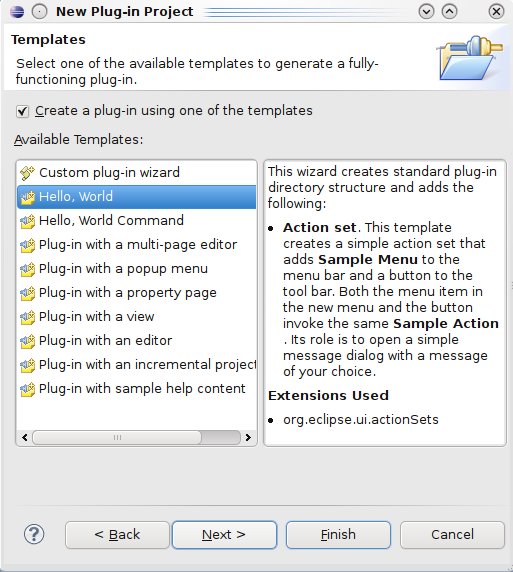
- Select
Hello, Worldand accept the default options in the next screen. Click onFinish. - Your new plug-in is now created with all the code necessary to add a button to the main Eclipse toolbar. You will see the plug-in in action and then, you will look at the code that was generated.
Trying the plug-in
- With Eclipse, you execute a program (e.g., a Java application) or a plug-in by creating a Run Configuration. The configuration defines the execution environment (e.g., which JDK to use, which program parameters to pass to the program, etc.). There are different types of configurations for different types of programs. For example, there is a configuration type for java programs, for unit tests, and for plug-ins.
- To create a Run Configuration for your plug-in, select the menu
Run / Run
                Configurations...
(or click on the arrow of the green "play" button in the tool bar and selectRun Configurations):
- Right-click on the
Eclipse Applicationoption and selectNew. This will create a new Eclipse configuration. Essentially, when you use this configuration, a new Eclipse application will be launched with your plug-in:

- Click on the
Runbutton to try the new configuration and your plug-in. A new instance of Eclipse will appear. This instance has its own workspace and uses the plug-in code that you generated. - Locate the Eclipse logo in the toolbar:

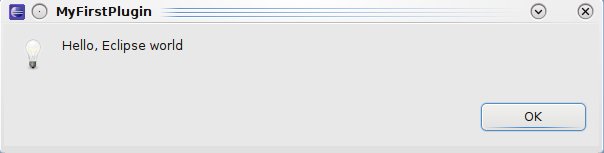
- Click on the Eclipse button and a message dialog will appear. This dialog is provided by the
plug-in you created:
Looking at the plug-in's code
- You will now look at the code that added this button Eclipse. The New Plug-in Project Wizard created many files now accessible through the package explorer.
- In the Package Explorer, the MANIFEST.MF and plugin.xml files contain the plug-in information such as the name of the plug-in and the features that it adds to Eclipse. Double-click on either of these files to open the plug-in editor. The editor hides the implementation detail of these files, so you do not need to know which file to edit..
- Go to the
Extensionstab and click onSample Action (action). You will see that this plug-in is adding an action to the menu and the toolbar and that the code implementing this action is in the classmyfirstplugin.actions.SampleAction.

-
Open the class
SampleActionby double-clicking on it in the Package Explorer. The code that displays the message dialog is located in the methodrun(IAction action):/** * The action has been activated. The argument of the * method represents the 'real' action sitting * in the workbench UI. * @see IWorkbenchWindowActionDelegate#run */ public void run(IAction action) { MessageDialog.openInformation( window.getShell(), "MyFirstPlugin", "Hello, Eclipse world"); } - In summary, there are two parts when creating a plug-in. First, you need to declare what the plug-in will do (e.g., add a button in the toolbar). This is done in the MANIFEST.MF and plugin.xml files. Second, you need to write the code to perform some tasks (displaying a message dialog, filling a view, etc.).
Next steps
Try to add another button that displays another message by using the SampleAction as a template. You will need to declare a new action in the plug-in editor and you will need to create a new class that looks like SampleAction.
Look at the Eclipse platform developer guide to learn more about the various features of Eclipse. For example, you can interact with the files in the workspace, you can create a view, etc.
In the next section, you will learn how to use the PPA API. You will start from SampleAction, but instead of displaying a message dialog, you will print the abstract syntax tree of a partial program in a text file.